Frame setup, step by step
What the setup page looks like as one card goes from download to a machine reporting itself active as a frame. Read it before you have a token, or beside the real thing while a Pi boots. Click any capture to see it full size.
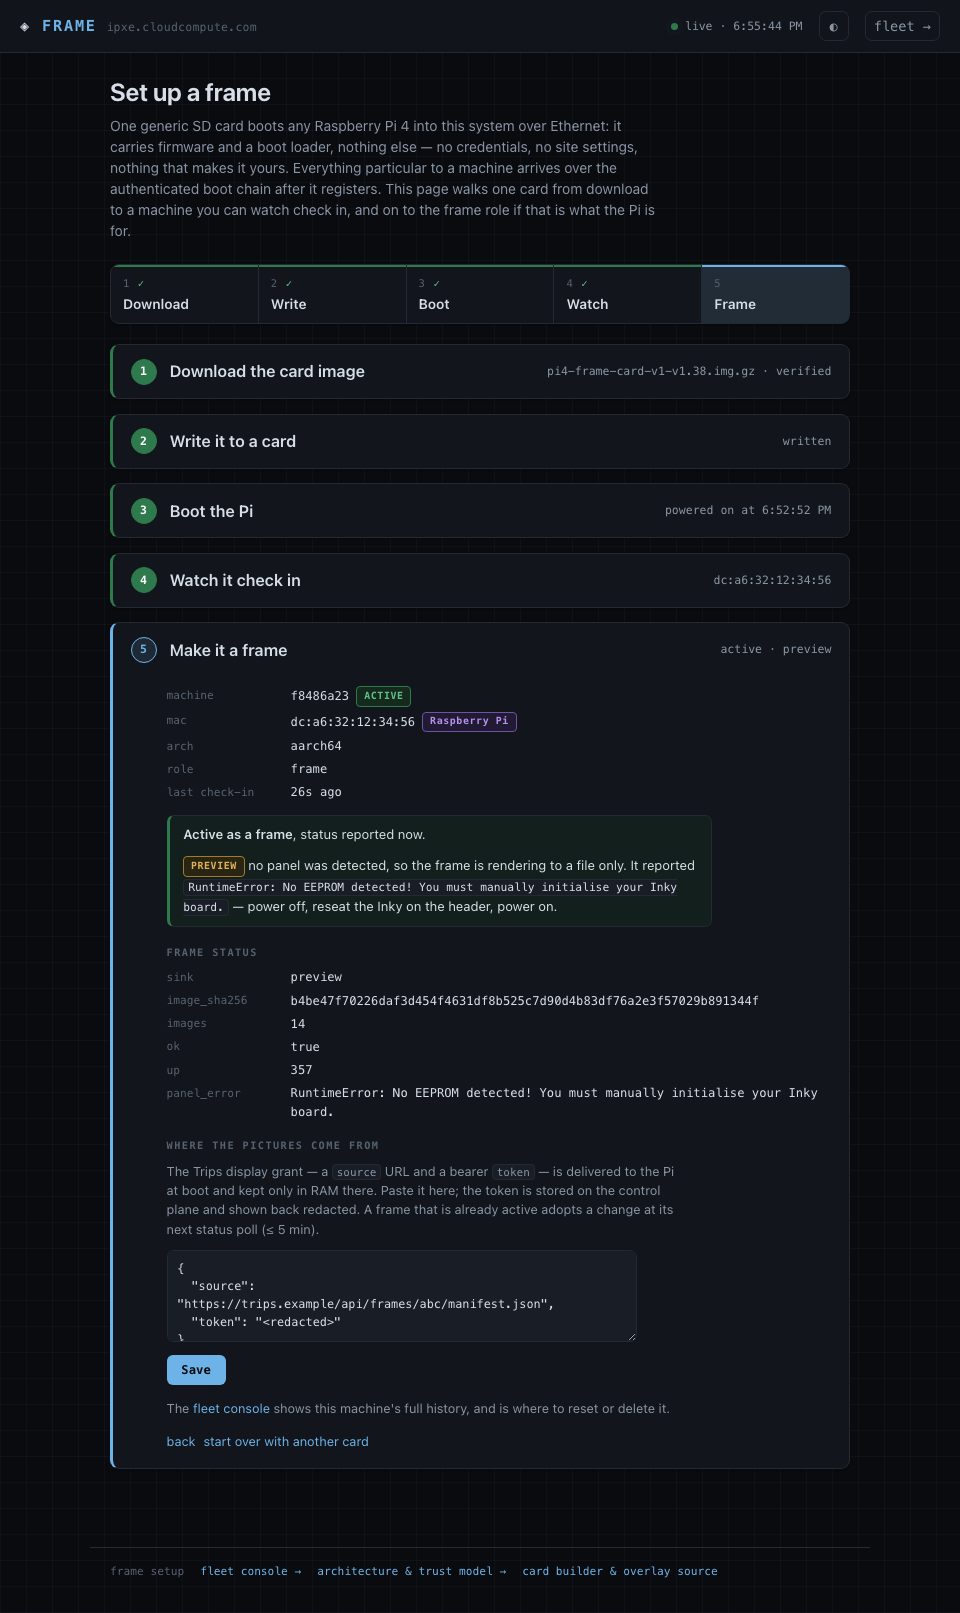
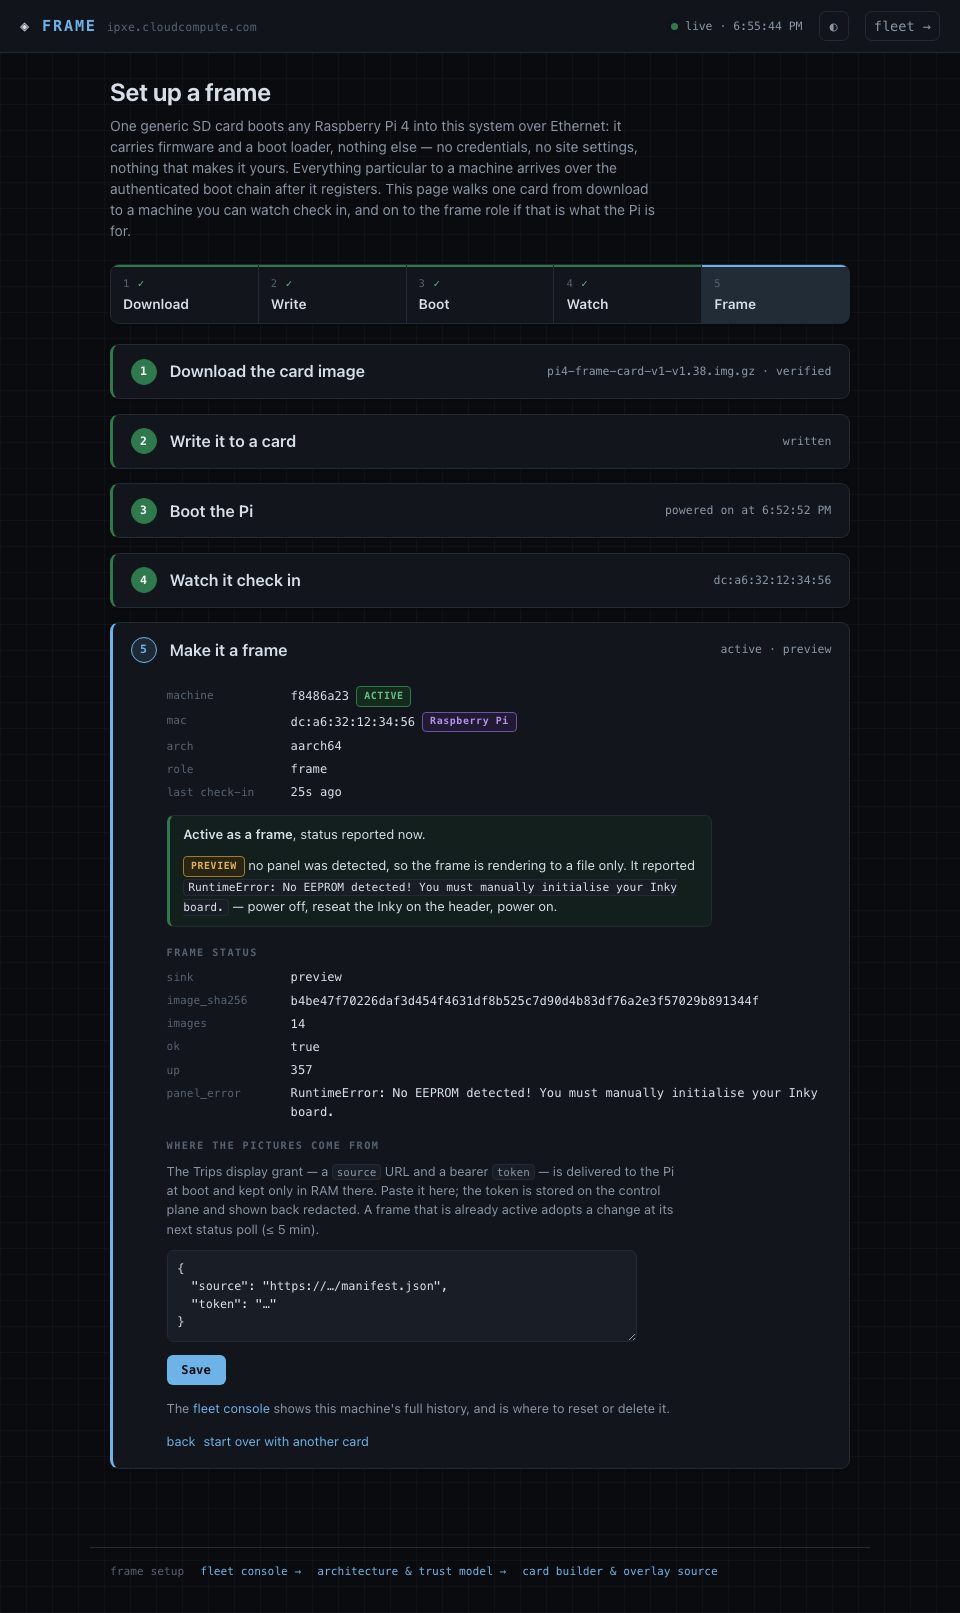
active, sink preview, "No EEPROM detected" — is copied
from what the bench frame reports today with no panel attached, so what you see is the honest shape of the
page rather than a best case. No physical card was written or booted for these.
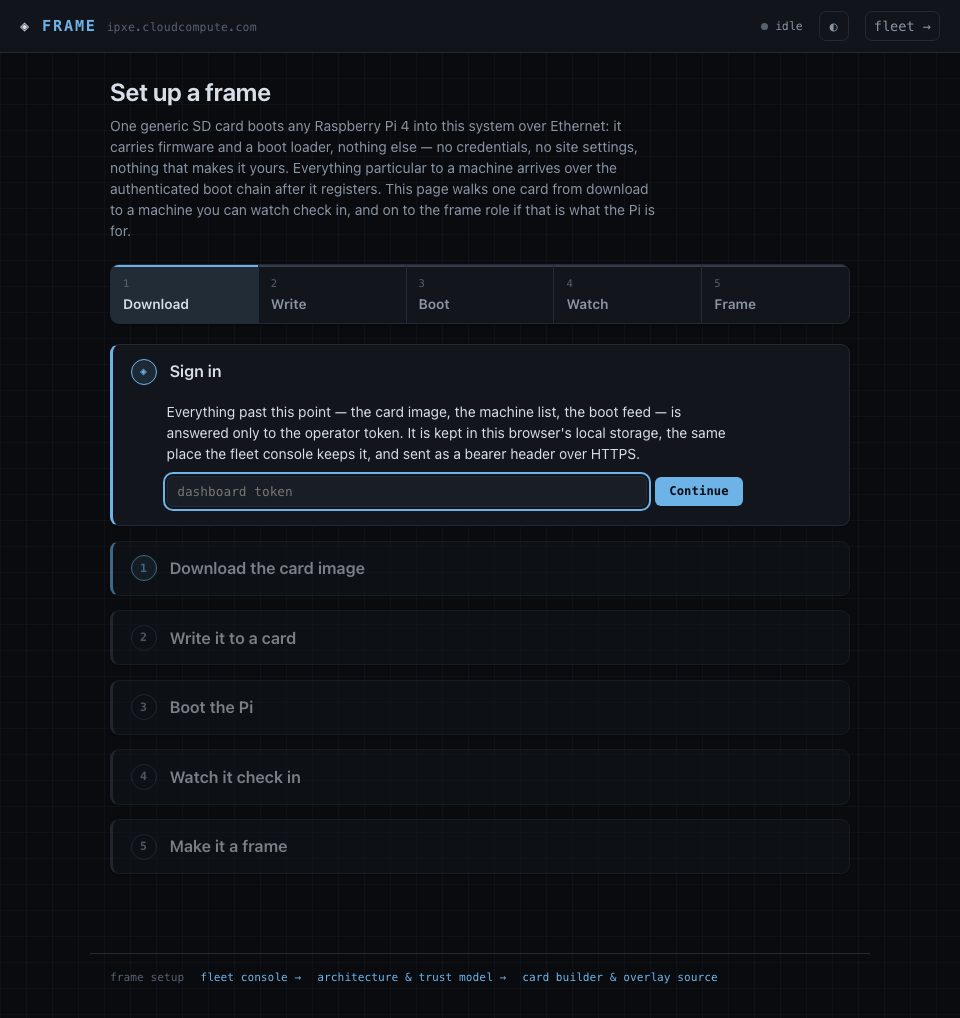
Every step is folded until the operator token is entered. It is the same token the fleet console uses, kept in the browser's local storage, and sent only over HTTPS — a plaintext load is redirected before this renders.
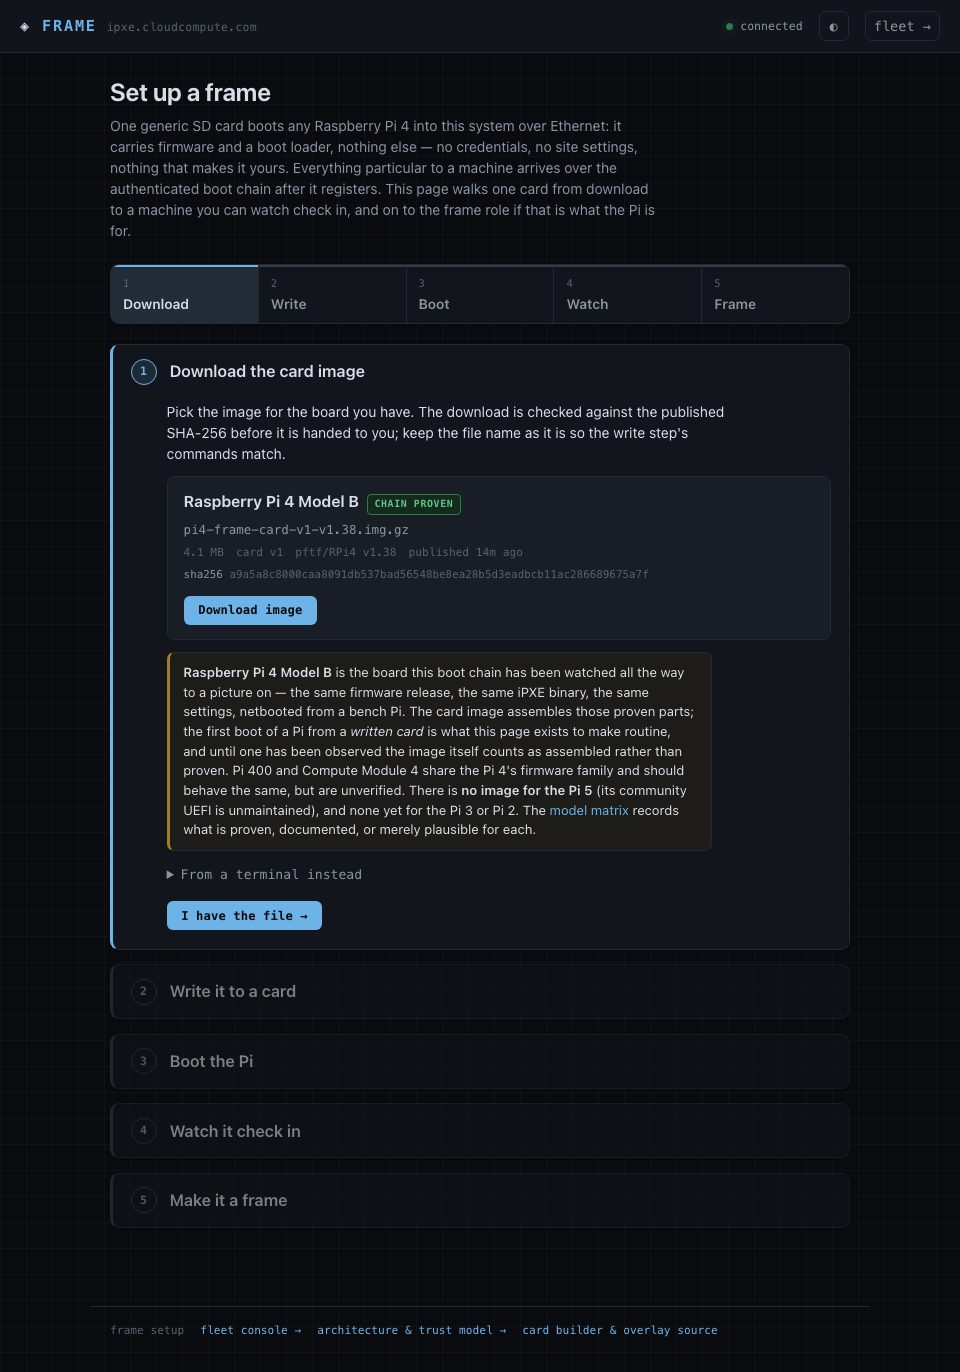
The board it fits, the file, its size, the firmware release, when it was published, and the SHA-256 it was published with — read live from the control plane. Below it, the honest model note: what is proven, what is expected, what has no image at all.
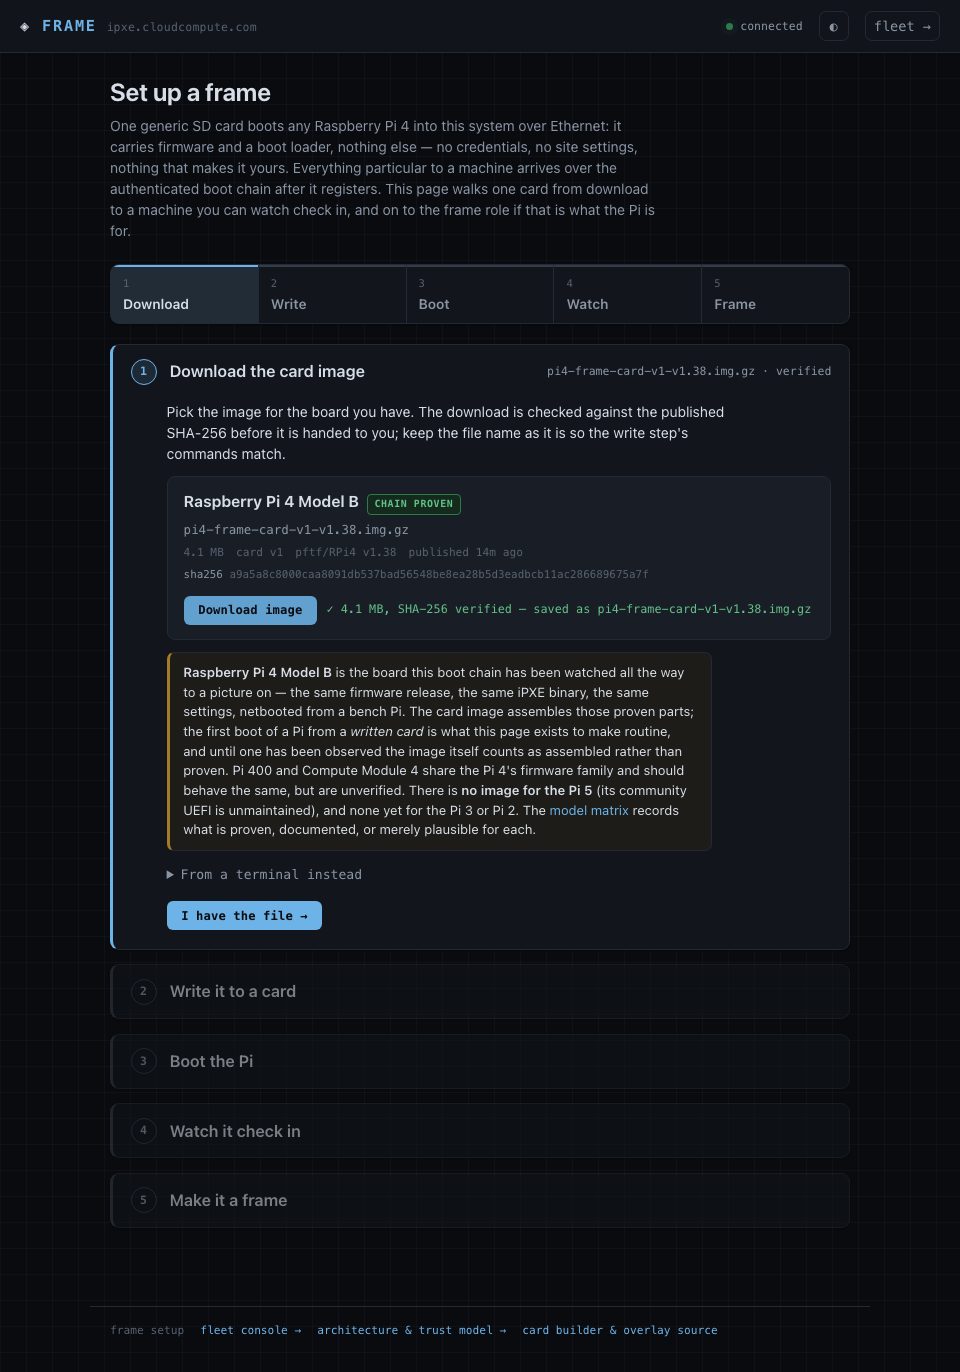
The browser fetched the image with the bearer, hashed it, and matched the published digest before
offering the file. A mismatch is refused and nothing is saved. The curl alternative under
"From a terminal instead" does the same with shasum -c.
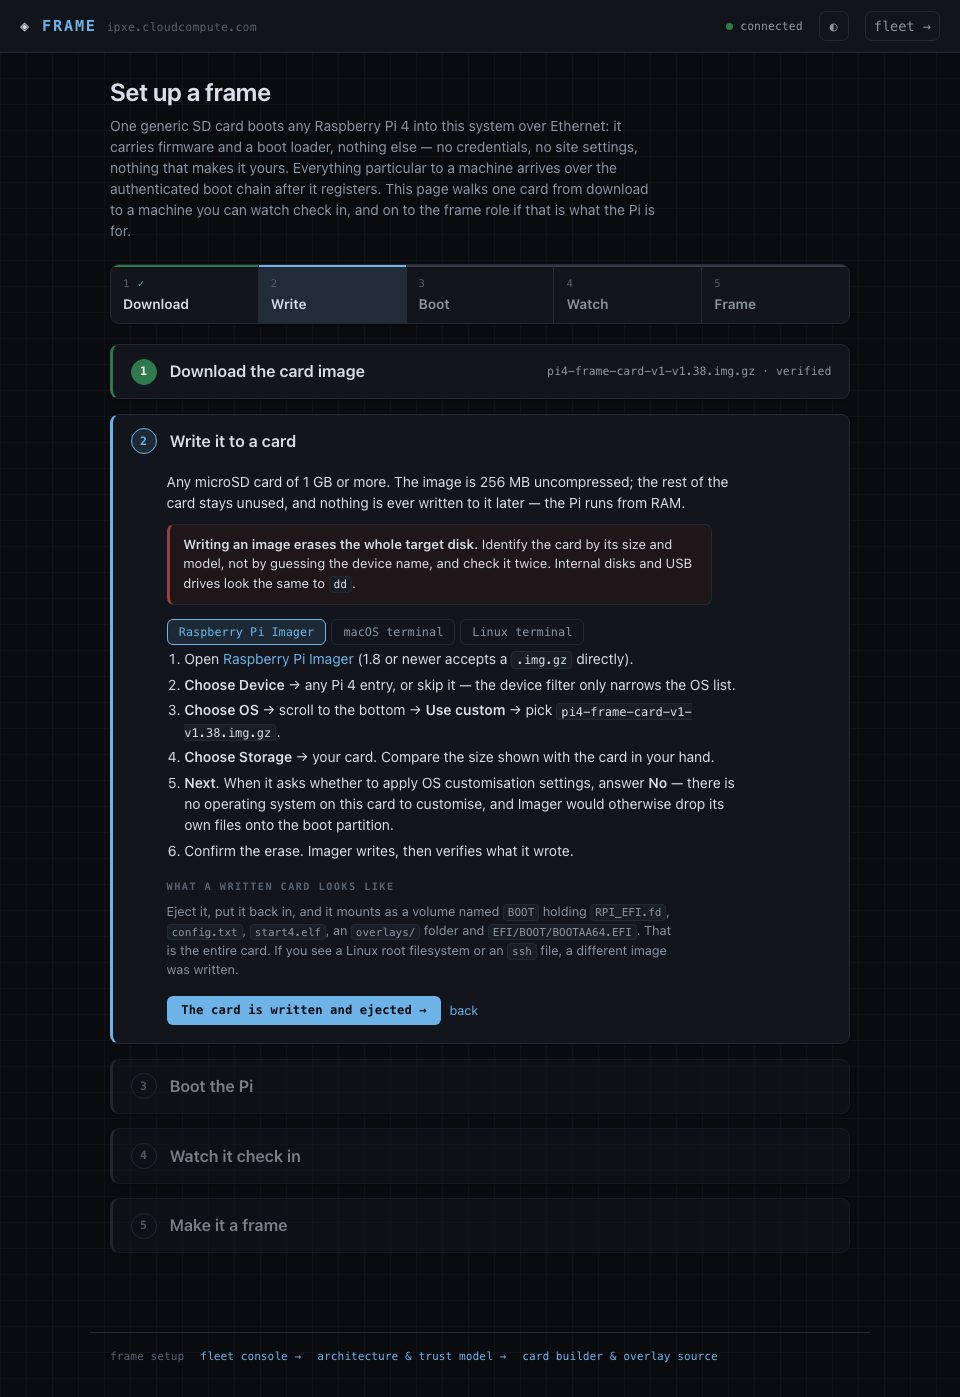
The default tab: Imager accepts the .img.gz directly. The one thing to get right is answering
No to OS customisation — there is no OS on this card to customise.
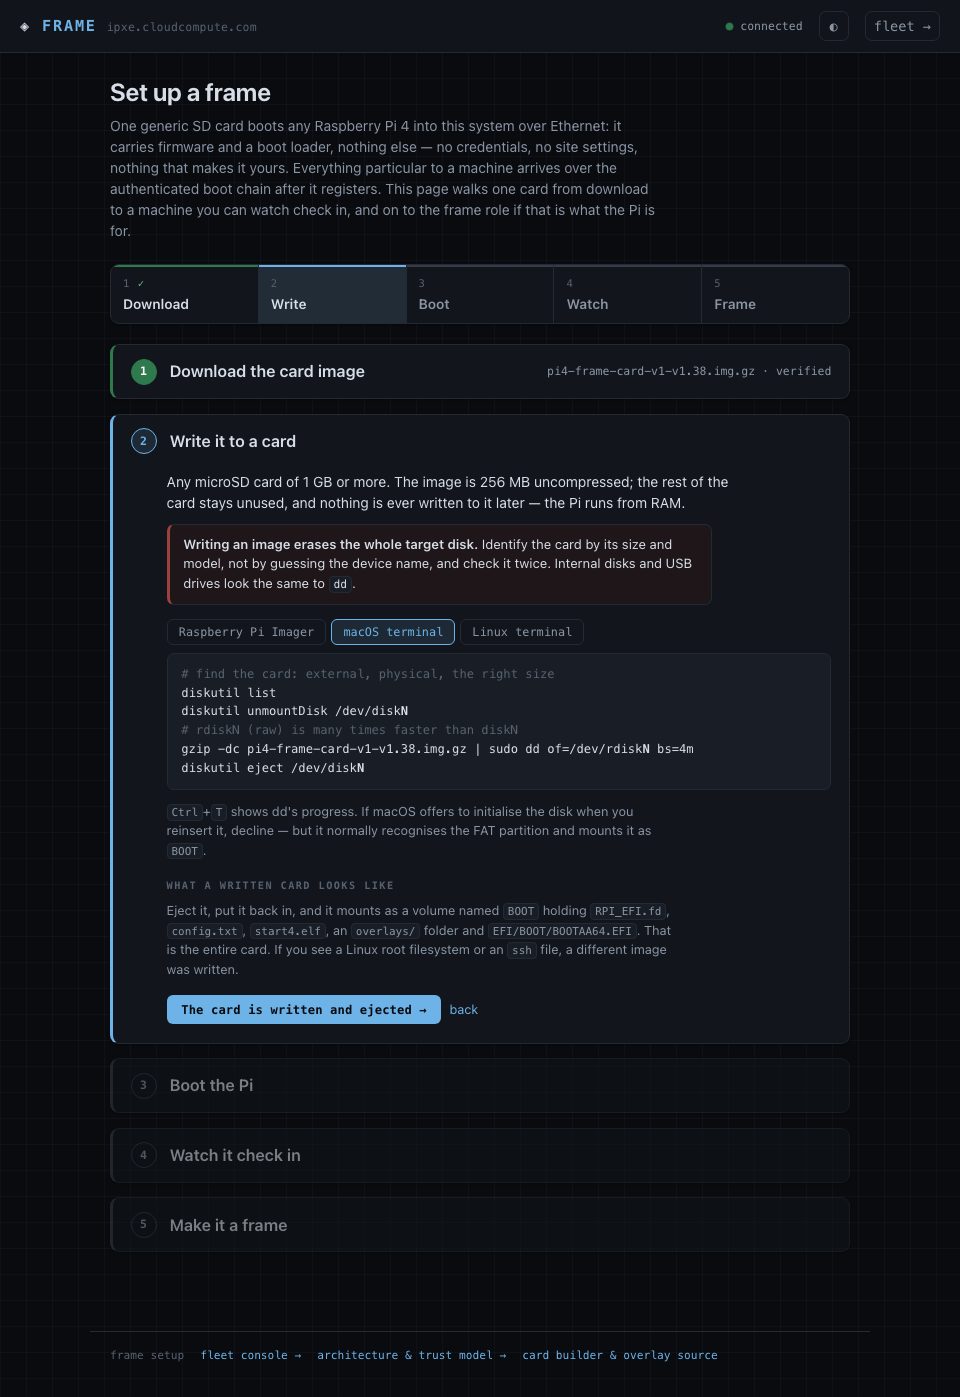
The dd path with the downloaded file name already substituted, and what a written card looks
like when it comes back: a BOOT volume with the firmware and EFI/BOOT/BOOTAA64.EFI,
nothing else.
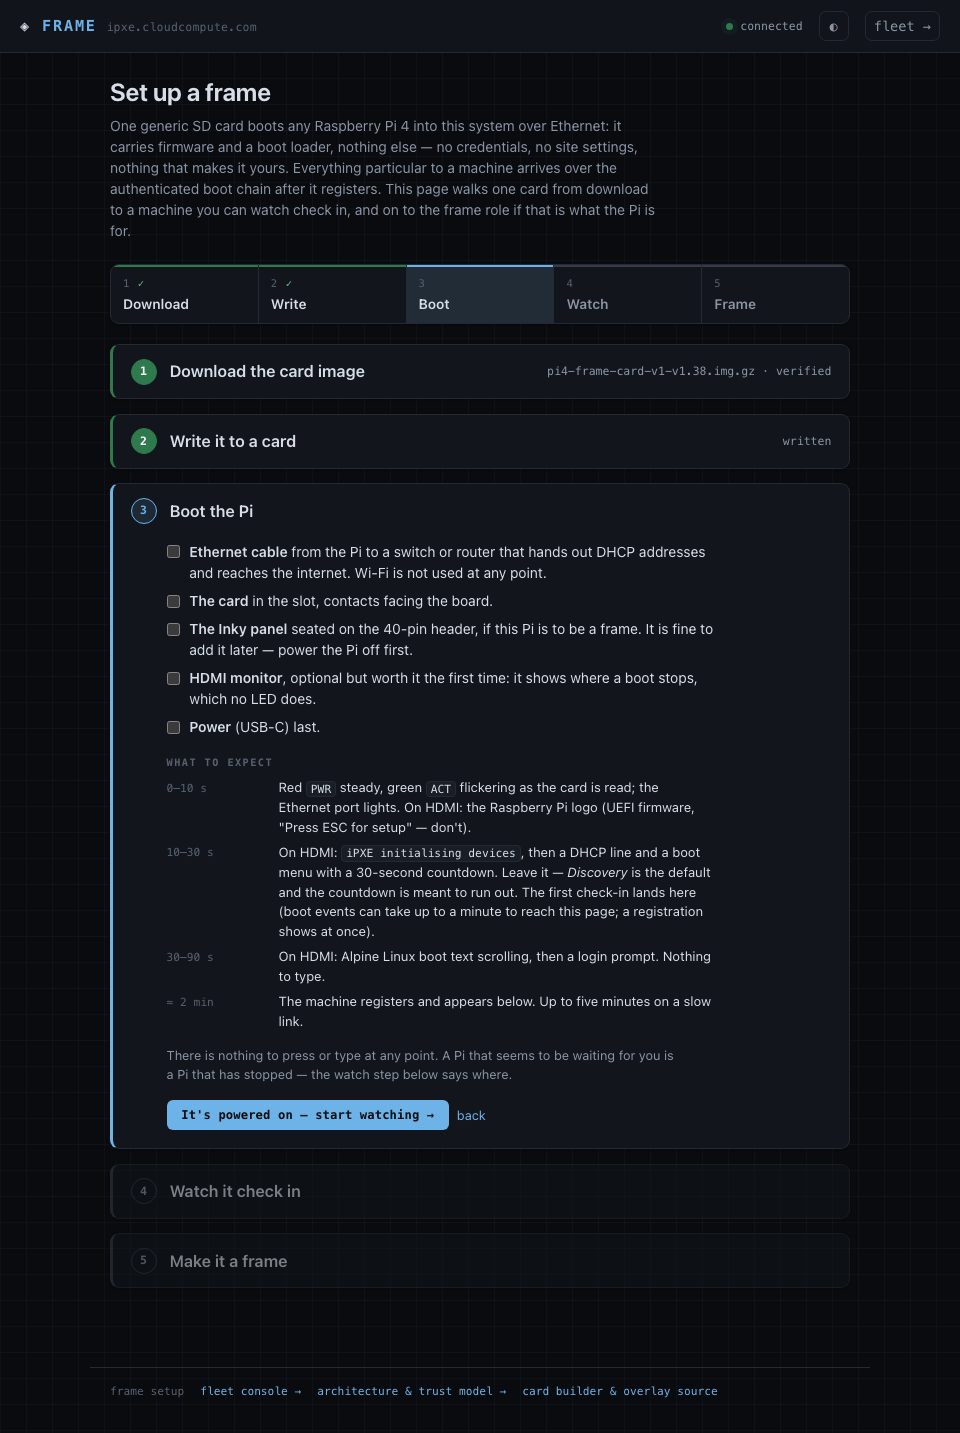
Ethernet only, card in, panel seated if this Pi is to be a frame, HDMI if you want to see where a boot stops, power last. Then what to expect and roughly when: LEDs, the UEFI logo, iPXE, the 30-second menu countdown that is meant to run out, Alpine, registration at about two minutes.
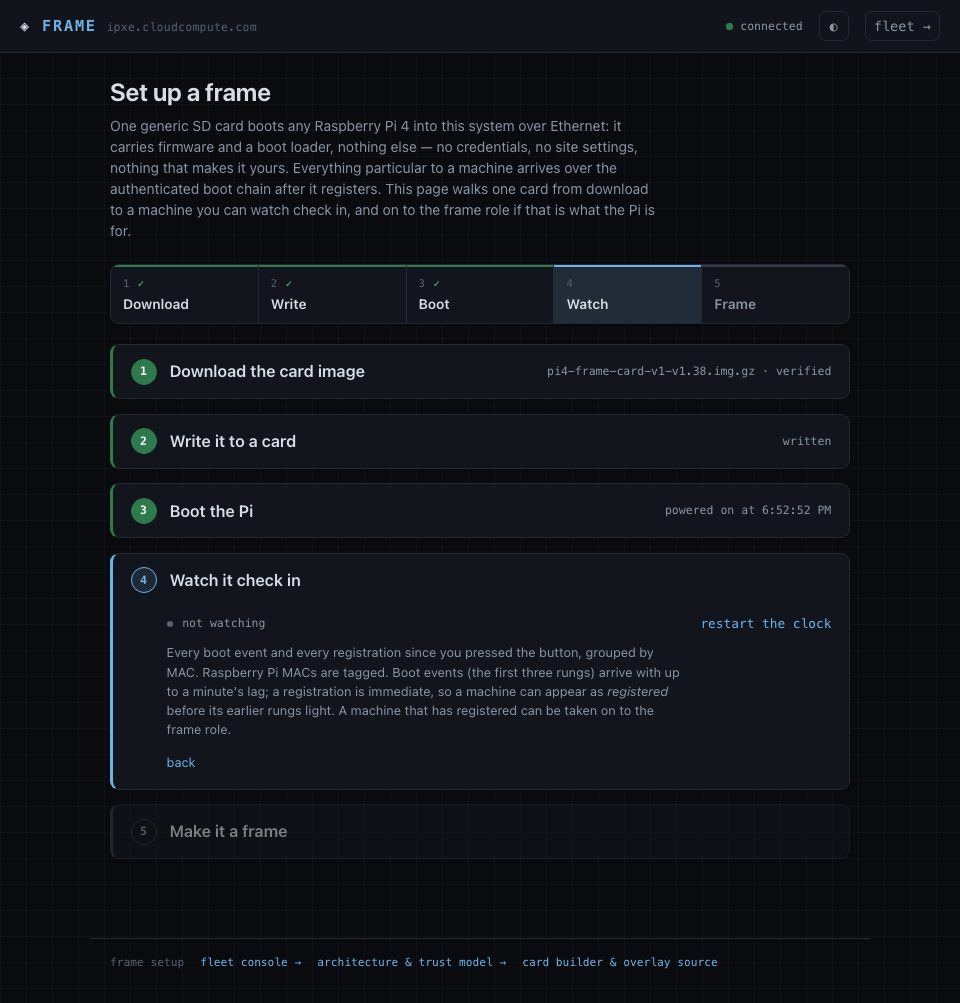
The button starts the watch clock and snapshots the machine list — what appears after this moment is new.
Watching, clock running. The empty state names the first sign to look for and warns that boot events reach the page with up to a minute's lag; a registration shows at once.
A MAC appears, tagged Raspberry Pi by its address range, with the first rung of the ladder lit: the firmware loaded iPXE from the card and iPXE reached the boot menu.
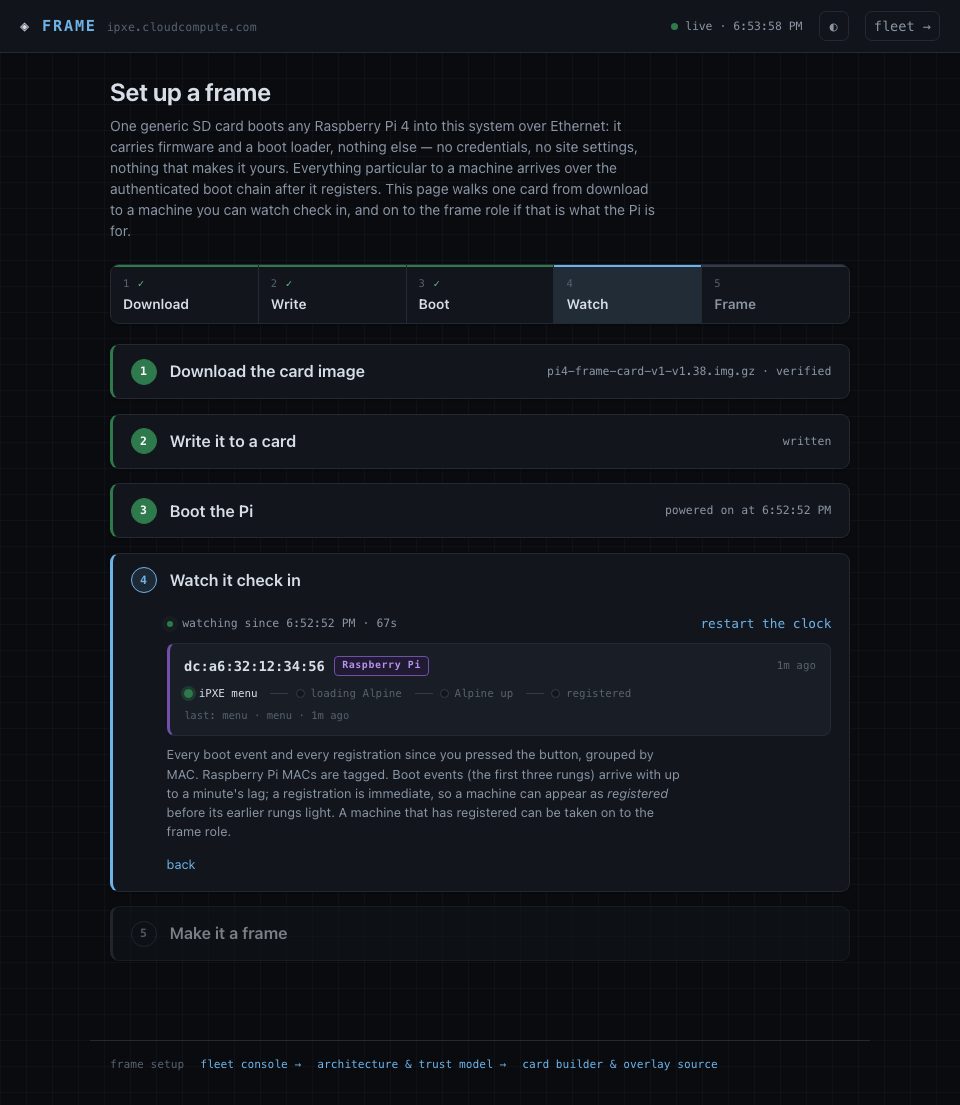
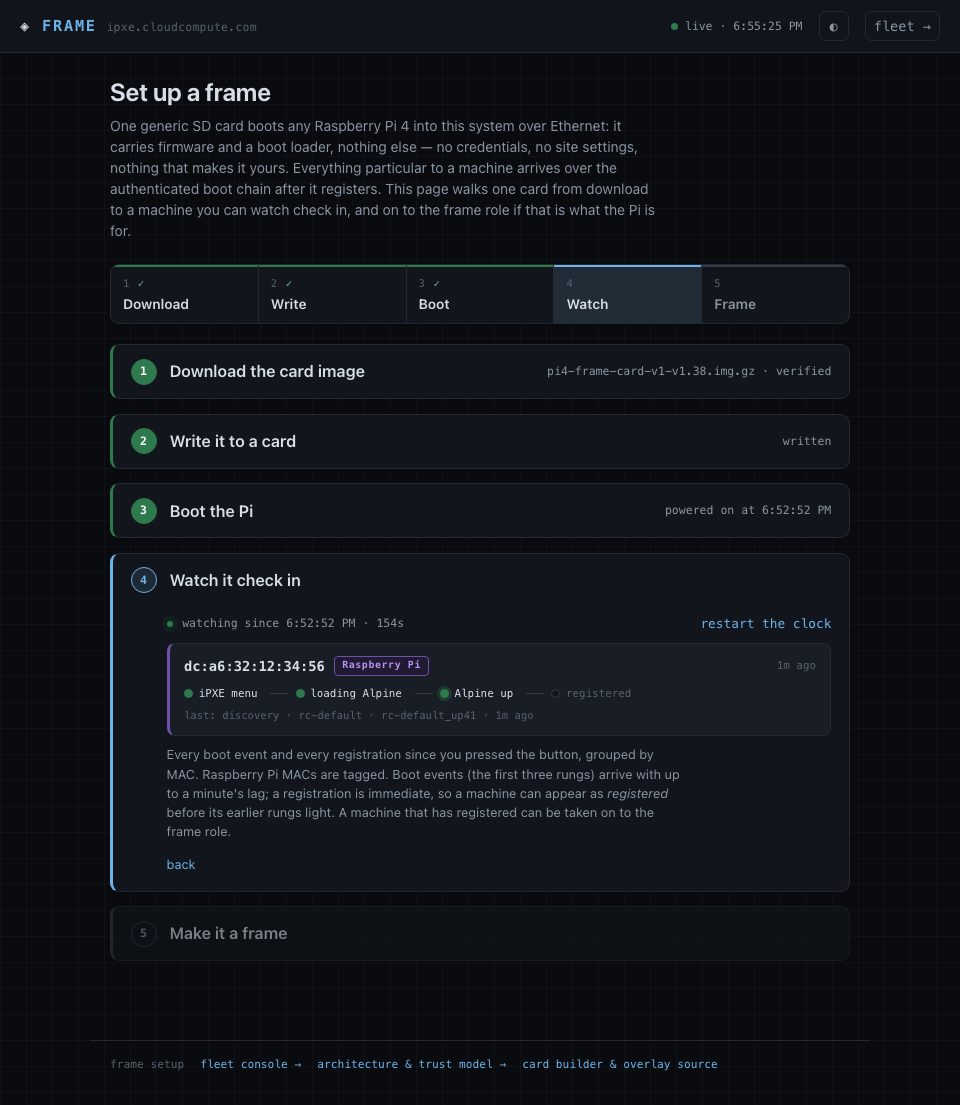
Kernel loaded, then the node's own beacons from inside Alpine. The last event's target, stage and detail sit under the ladder — the same fields the fleet console's boot feed shows.
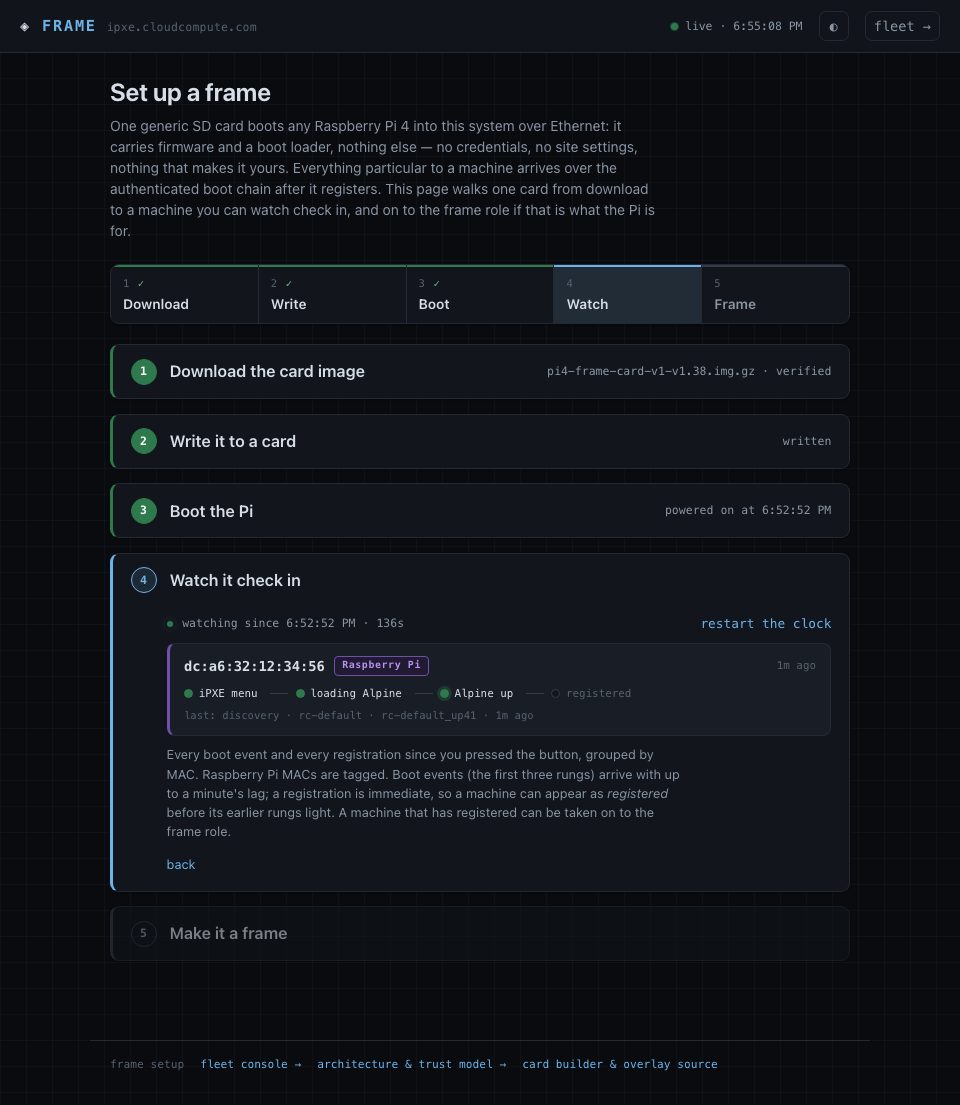
The machine registered: a state chip, its short id and arch, and the button that carries it into the frame step. This is the moment the setup page exists for.
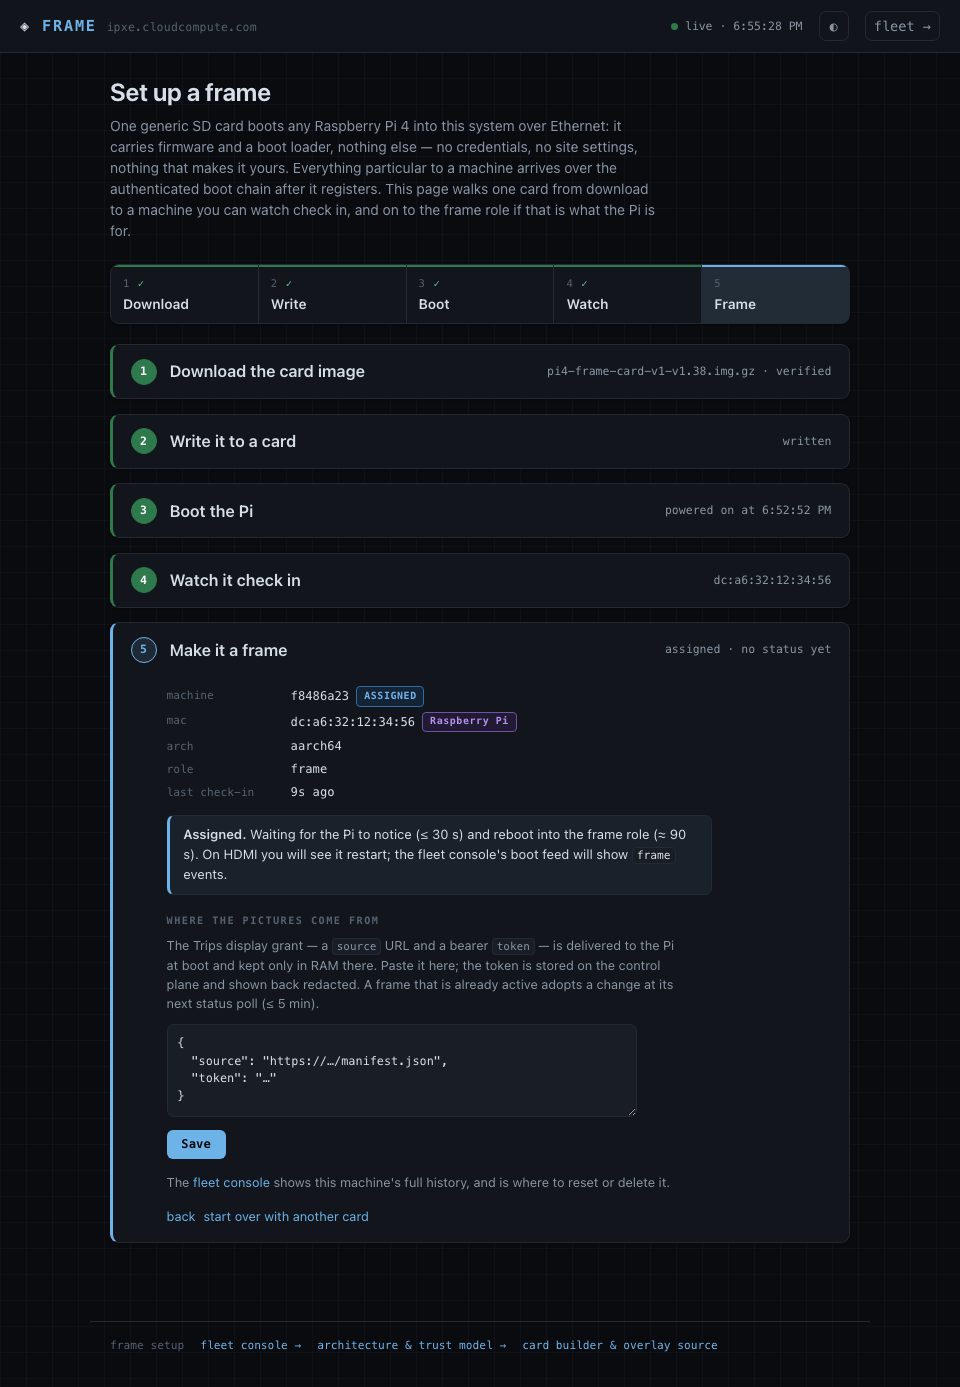
The machine's registry row and the one operator step in the chain. The Pi polls for its assignment every 30 seconds and reboots itself into the role; nothing is written to the card.
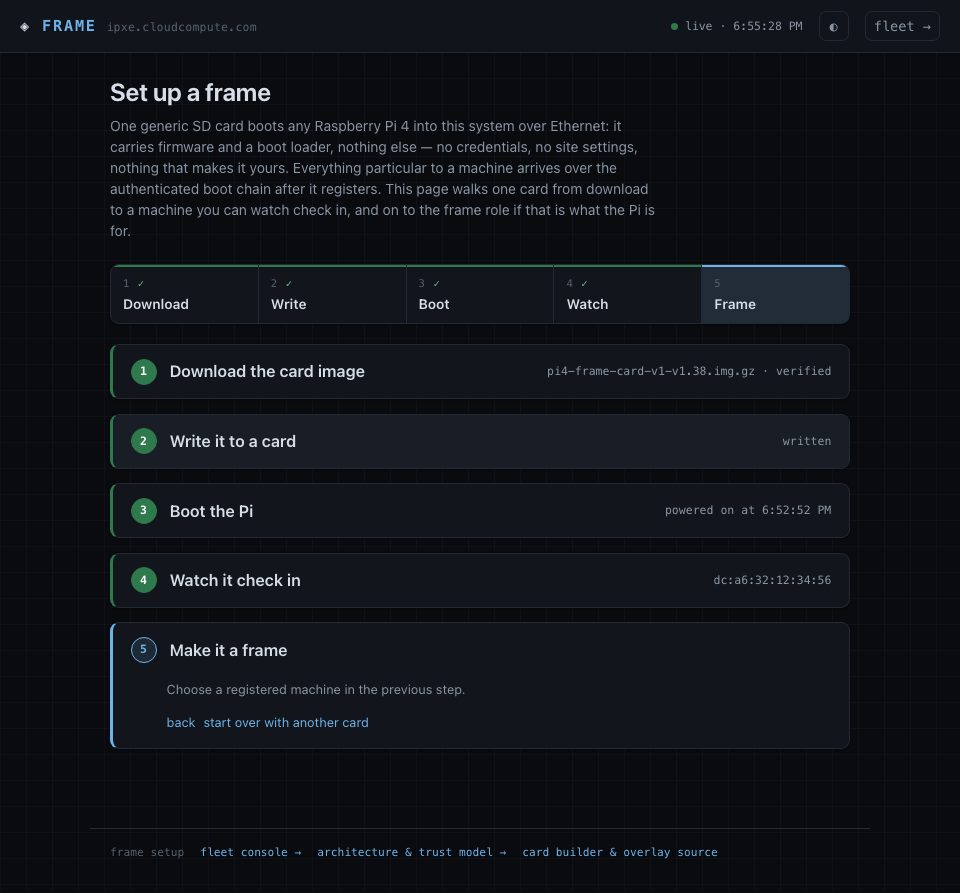
State assigned, role frame. The page says what happens next and how long it
takes, and the field for the Trips grant is ready whether or not the Pi has come back yet.
Back from its reboot as a frame. The sink says where the picture is going: inky means the panel is being driven; preview means no panel was detected and the frame is rendering to a file, with the EEPROM error quoted and the fix stated. This capture shows the latter, because that is what the bench frame reports today.
A Trips grant pasted and saved reads back with its token <redacted>. It reaches the Pi
over the authenticated boot chain and lives only in RAM there; a frame that is already active picks up a
change at its next status poll.